.svg)
When configuring your Booking Flow, you can choose from three different Booking Experiences:
-
Time selection, where users select a start and end, or a duration, then see which resources are available for that time.
-
Time slots, where users choose a predefined time slot or a resource, then see the corresponding availability.
-
Resource availability, where users select a resource first, then check its availability in the calendar for the selected day.
Each option has its own set of settings and particularities that affect how users can book a resource. The system accepts time and date values using:
-
wfor weeks -
dfor days -
hfor hours -
mfor minutes
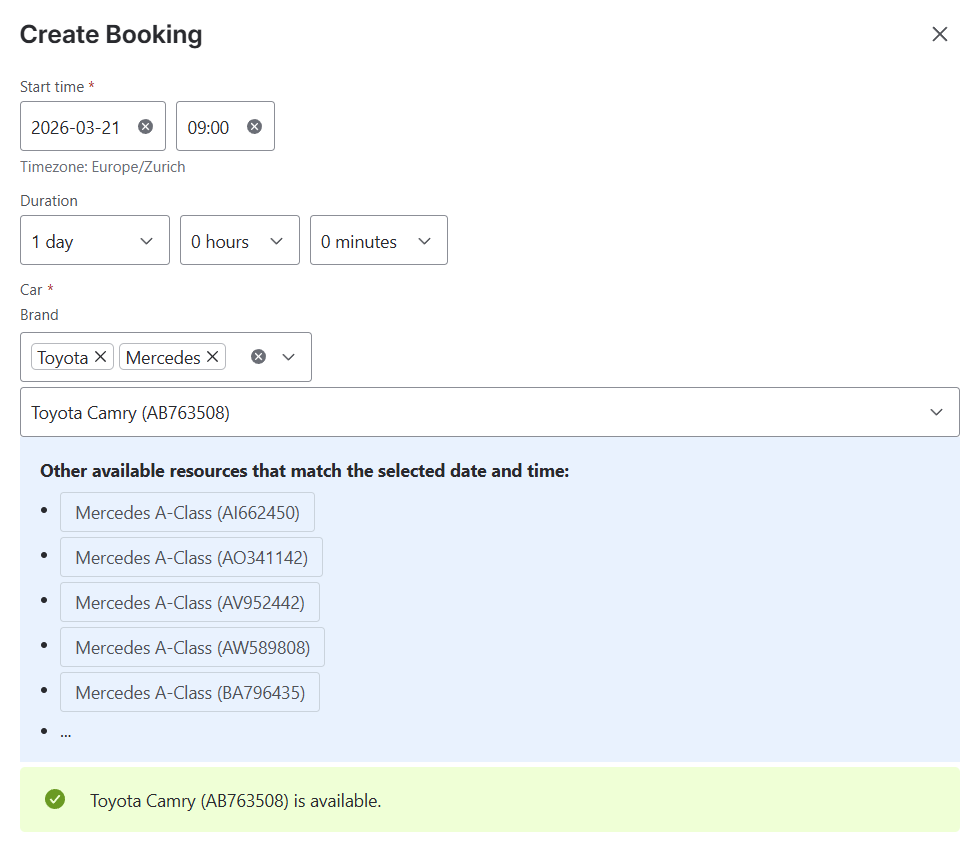
Time Selection
Where users select a start and end, or a duration, then see which resources are available for that time.
Steps
-
In the Booking Hub, click the Open button next to the Booking Flow you want to edit.
-
Click Edit Booking Flow.
-
Go to the Availability tab.
-
Select Time Selection in the Booking Experience field
-
Select the fields you want to display in your booking field:
-
Start + End to display the Start and End fields
-
Start + Duration to display the Start and Duration fields
-
Start + Duration or End to display the Start, End and Duration fields
-
-
Define the Default Start Time. Examples:
-
1d→ Tomorrow at 00:00 -
1d 8h→ Tomorrow at 08:00 -
8h→ 8 hours from now
-
-
Define the Default Duration. Examples:
-
1h 15m→ 1 hour and 15 minutes -
48h→ 2 days -
1w 2d→ 1 week and 2 days
-
-
(Optional) Define the Maximum Duration.
-
This limits how long a resource can be booked.
-
Example:
8hprevents bookings longer than 8 hours.
-
-
Customize the label for the Duration field. Example: Use Durée (French) or Duración (Spanish) instead of “Duration”.
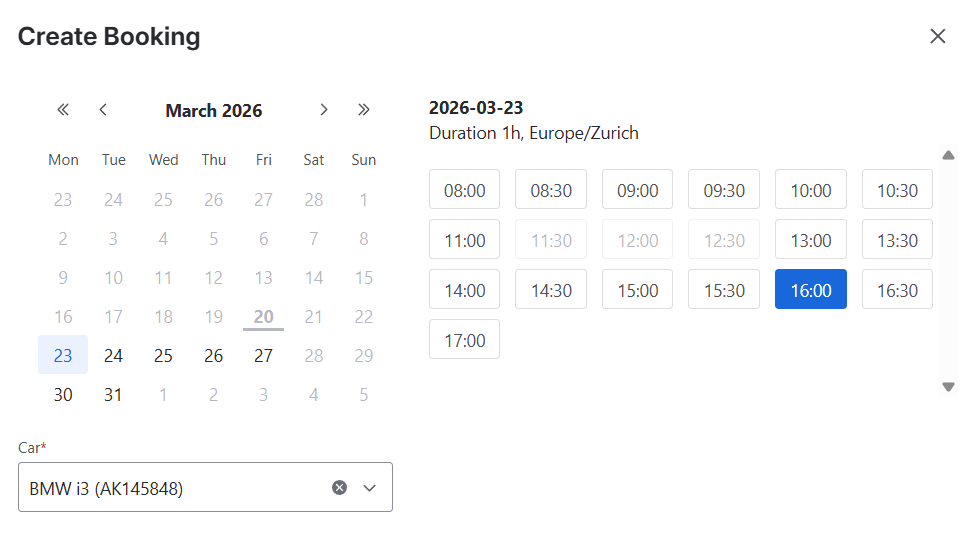
Time Slots
Where users choose a predefined time slot or a resource, then see the corresponding availability.
This option allows you to define recurring availability windows.
-
In the Booking Hub, click the Open button next to the Booking Flow you want to edit.
-
Click Edit Booking Flow.
-
Go to the Availability tab.
-
Select Time Slots as your Booking Experience.
-
Select the Timezone where the resource is located.
-
Choose the days of the week and a time range to define an Availability Window.
-
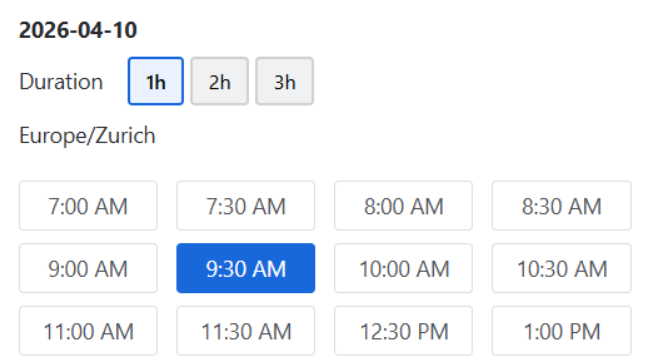
Define the Duration(s) of the booking slots.
advanced edition
Your users can choose the slot duration when adding multiple durations separated by commas, e.g. 1h, 2m, 3h
Tip
Click +Add availability to create multiple availability windows
Additional Settings
You can define the booking window using one of two methods under the Additional settings:
-
Period of Rolling Time: Define a rolling window of time for booking.
-
Custom Date Range: Define a specific start and end date when a user can book a resource.
Period of Rolling Time
-
Under Additional Settings, select Period of rolling time.
-
Define the Rolling time using the accepted values. This sets the maximum time into the future a user can book a resource. Examples:
-
dmeans booking is possible until the end of the same day. -
1dmeans booking is possible for the same day and the day after. -
0wmeans booking is possible until the end of the current week. -
1wmeans booking is possible until the end of the current week and the week after.
-
Define the Minimum notice time. This determines the minimum amount of time required before a user can make a booking. Examples:
-
0dmeans booking is possible from now on. -
8hmeans booking is possible from 8 hours from now. -
1d 14hmeans booking is possible from tomorrow at 14:00. -
0wmeans booking is possible from now on. -
1wmeans booking is possible from the beginning of next week.
-
Define the Start time increment. This setting defines the frequency of your booking start times, such as every 15, 30, or 60 minutes.
Custom Date Range
-
Under Additional Settings, select Custom Date Range.
-
Define the Start and End Dates where a user can book a resource.
-
Define the Minimum notice time and Start time increment. These behave the same as for Period of Rolling Time.
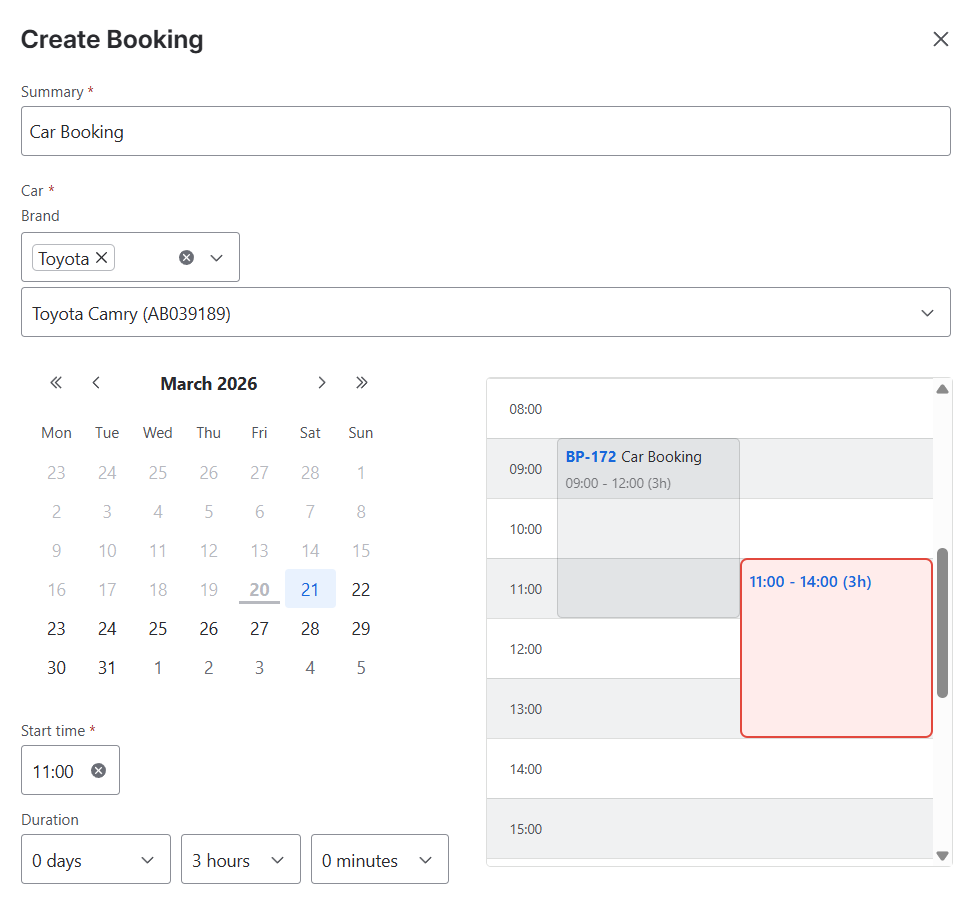
Resource Availability
Where users select a resource first, then check its availability in the calendar for the selected day.
Steps
-
In the Booking Hub, click the Open button next to the Booking Flow you want to edit.
-
Click Edit Booking Flow.
-
Go to the Availability tab.
-
Select Resource Availability in the Booking Experience field
-
Select the fields you want to display in your booking field:
-
Start + End to display the Start and End fields
-
Start + Duration to display the Start and Duration fields
-
Start + Duration or End to display the Start, End and Duration fields
-
-
Define the Default Start Time. Examples:
-
1d→ Tomorrow at 00:00 -
1d 8h→ Tomorrow at 08:00 -
8h→ 8 hours from now
-
-
Define the Default Duration. Examples:
-
1h 15m→ 1 hour and 15 minutes -
48h→ 2 days -
1w 2d→ 1 week and 2 days
-
-
(Optional) Define the Maximum Duration.
-
This limits how long a resource can be booked.
-
Example:
8hprevents bookings longer than 8 hours.
-
-
Customize the label for the Duration field. Example: Use Durée (French) or Duración (Spanish) instead of “Duration”.